Before we share any Tips to Speed up Windows 7, we want to let all the people know that Windows 7 is the most loved operating system till date, even most used too. After Windows XP, this was another fantastic release by Microsoft. Once Microsoft has decided not to provide any support and security updates for Win XP, the users for the Windows 7 has been increased rapidly. Mainly, Windows 7 is preferred for its simplicity, fast speed and user friendly appearance. Windows 7 comes in various editions, you just have to choose the perfect one that meets all your needs. The Microsoft Windows 7 is available in 6 different editions which includes, Ultimate, Professional, Enterprise, Home Premium, Home Basic and Starter. In short, Windows 7 is for everybody, whether you are a home user, professional or an artist.
Generally, while opting any operating system for our computers, majority of the people will prefer speed over appearance. This is actually the right selection, after all the speed in the operations matters the most. Just imagine to operate any Pentium-3 system, packed with Windows 8. Yes, you the actual point here, hardware capabilities also plays an important role while selecting the operating system for our computers. Anybody can take these wise decisions at the start of the journey, what to do at the later part. Here, we are trying to point out the slowness of the systems after 15-20 days of the fresh install of the operating system. Have you ever realized that the system is getting slower and slower. What to do under these circumstances 🙂 . No worries, Today we are going to share the ultimate solution for this day by day slowness of the computer systems. Here goes the TIPS to Speed up Windows 7.
Tips / Tutorial / How to Speed up Windows 7.
Main Factors that effects Computer / System Performance.
System Processor.
Make sure that you always have the recommended processor (not minimum) for the installed operating system. You can check the documentation of your operating system to check the same.
RAM ( Randon Access Memory).
Same rule, make sure that you have the recommended RAM installed into your system. Remember, RAM plays an important roles in the execution of all the processes in the computers. Actually, Random access memory is the brain of the computer and is accessed randomly by many different processes. Don’t you think, this is too much load on this small “RAM” 🙂 .
Settings within the Operating System.
Majority of the people use default system setting for all their lifetime. It’s not their fault, they actually are unaware about the internal functionality of the Operating System. Due to this lack of knowledge, they never try to disturb any of the setting, and believe that changing any setting will make their system unstable or hang.
Here, we can’t do anything for the first 2 options, for processors and the RAM. If needed, you have to upgrade these hardware yourself. Offcouse Yes, we can help you with the last option left, SETTINGS. Just follow all the steps to speed up Windows 7, we bet that it will fasten your Computer System by 70% atleast.
A- Uninstall all unused programs / Softwares.
Why to keep the programs which actually are never in the use, or will be used in the future. Step to remove such program are given below.
1)- Go to the start menu and search for “Add or Remove Programs” in the search box there.
2)- Now click “Add or Remove Programs“, in the opened window, select the related program and click “Uninstall / Change” at top of the opened window.

3)- Follow the on screen instructions and it will get done.
B- Disabling unwanted items at Startup.
Installation now a days is getting easier and easier. We never knows the changes any particular installation has made to our system. Software providers always want their application on the top of all, to achieve this, they simply instruct the computer to load it at startup after every reboot. Don’t you think, this is an unnecessary burden on the system. Below are the steps to remove such application from the startup.
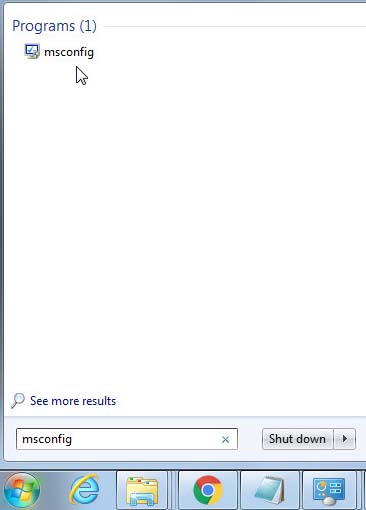
1)- Go to the Start Menu, Type “msconfig” in the search BOX.
2)– Now click this found “MSCONFIG” application in the results.
3)- In the msconfig window, go to the STARTUP Tab and uncheck all the unwanted applications. For example, uncheck MS office, Adobe etc etc, don’t touch the Drivers, Antivirus etc.

4)- After unchecking all the unwanted application, Hit OK. It will ask you to restart the computer, restart it and feel the quickness in the BOOT time of the computer.
C)- Optimizing Virtual Memory.
Do you know what this Virtual Memory is all about ?, Oh no worries here is the answer. When the system uses all the available physical memory (RAM) then it comes to use this Virtual Memory placed on our hard drives. A file named as “Pagefile.sys” represents the virtual memory of the system. Optimization of this Virtual Memory is a must if you are willing any best performance from the system.
We were shocked, when seen this for the first time. The only question came to our mind was, Why Microsoft haven’t pre optimized this for the users. No worries, here we will instruct you about how to optimize the virtual memory to speed up Windows 7.
1)- Go to the start menu again and TYPE “Windows Explorer” there in the search box. You will find the “Windows Explorer” in the results, Simply click that to open it.
2)- Here, Right click on the Computer icon and select / open properties from there. A new window will open.
3)- Now click “Advanced system settings” option, A new window named “System Properties” will open up.
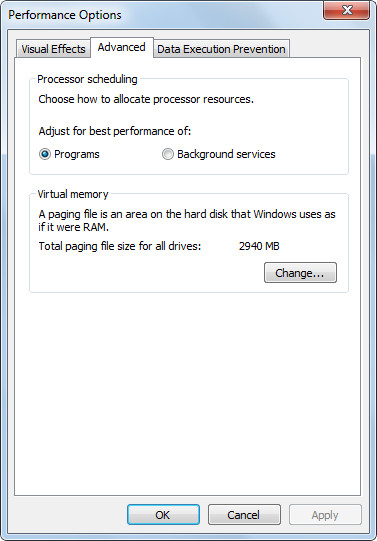
4)- Now, under Advanced TAB, click settings under “Performance“, a new window “Performance Options” will open up.
5)- In “Performance Options” window, select the Advanced TAB again, and HIT “CHANGE“.
6)- Now, uncheck “Automatically manage paging file size for all drives” and select your system drive (mainly C:). (See the image of step no 8.)
7)- Select Custom size if not selected.
8)- Here comes the main doings, Now check the recommended size of your Physical Memory. (For the systems with 2GB physical memory, it recommend to use 2940 MB of Virtual Memory size).
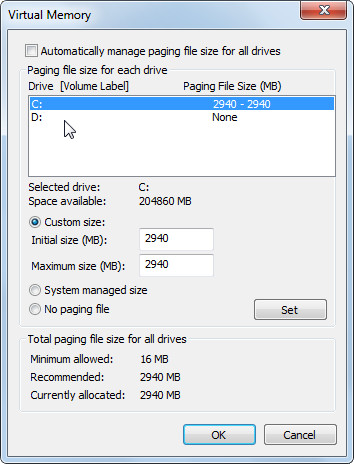
9)- After check the recommended virtual memory for your system, Place the exact number in both the text box against INITIAL size and MAXIMUM size.
10)- Now HIT ok and all is done, It will ask you to restart the computer, Restart it.
So, Don’t you think this has to be pre optimized by Microsoft in accordance to the physical memory installed.
D- Disabling unnecessary Visual Effects (most important).
As we already had discussed about why majority of the people will prefer speed over appearance. Believe us, you will find major improvements in the speed after applying these setting. Don’t worry, these setting will neither effect the appearance to any large extent. Below are the steps to apply these settings.
1)- Go to the Start Menu, and TYPE “Windows Explorer” in the search box, open “Windows Explorer”, Right Click on the Conputer icon, select / open Properties, and click “Advanced system setting” there. (already explained above 🙂 ).
2)- Now in “Advanced” TAB, click settings under “Performance” option.
3)- Now in “Visual Effects” TAB, Select Custom.
4)- Here you only have to select these 4 options:
- Enable desktop composition.
- Show thumbnails instead of icons.
- Smooth edges of screen fonts.
- Use visual styles on windows and buttons.
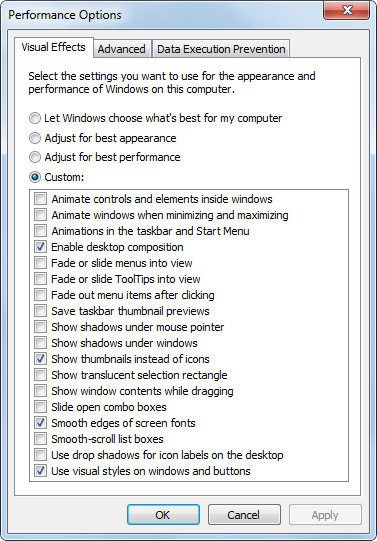
5)- After selecting all above options, HIT Ok and feel the difference.
Final Notes.
To tell you the truth, we have many more tweaks in our basket related to Speed up Windows 7, BUT in actual they never shown us any significance changes to the speed of any of the system. Following our tag line “Providing Information that Matters”, we only have shared, the tweaks that matters the most. We hope many will get benefited using these tweaks, and will share any of their experiences with us under the comments sections. Ok, that’s it, we will be back shortly with many more tweaks. Please SUBSCRIBE to this blog to get all the updates direct to your mail boxes.
Thanks for visiting a2z infomatics, GOD Bless Everybody.